
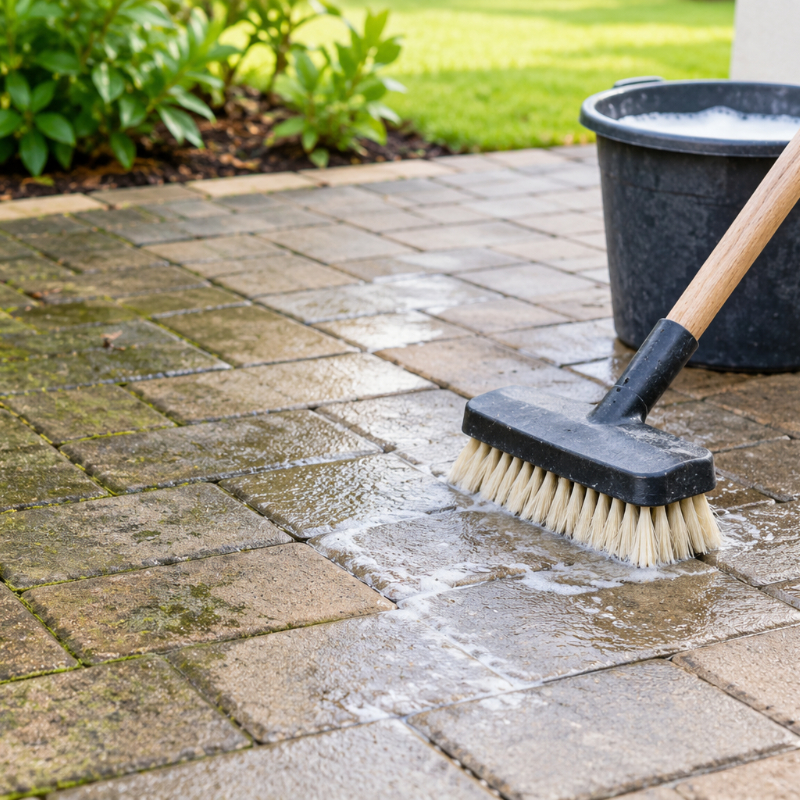
Sweep the pavers, remove weeds and moss, then wash with warm water and a mild detergent using a stiff brush. Treat mould and lichen separately, and rinse thoroughly. Keep pressure washers on a wide fan at low pressure, because high pressure strips jointing sand and the paver surface itself.
Grey where the stone used to be warm, green in the corner the sun never reaches, slippery for a day after rain, and a white bloom creeping across a few pavers near the step. Most paved areas in Sydney end up with at least two of those at once. We run paving services and garden work across Sydney, and the first thing worth saying is that the wrong method takes the surface off the paver rather than the dirt.
So this starts with identifying what you are actually looking at, then cleaning it in the right order, and finally knowing when cleaning is not the fix at all.
Work out what you are actually cleaning
Four different problems look much the same from the back door, and each one needs a different approach.
- Ordinary grime and traffic dirt. Dust, soil wash and foot traffic dulling the whole area evenly. This is the one that responds to detergent and a brush.
- Mould, algae and lichen. A green film, black spotting, or crusty grey-green discs that grip hard. It concentrates in shade and anywhere water sits, and detergent will not touch it.
- Efflorescence. Efflorescence is the white powdery bloom left behind when salts inside the concrete migrate to the surface with moisture and crystallise there. It is not dirt, so scrubbing achieves very little.
- Staining. Oil from a car or a barbecue, rust from a pot foot or a furniture leg, dark tannin from leaves left sitting through winter. These are localised, and each type needs its own treatment.
Getting this wrong costs you. Treating mould as though it were dirt wastes an afternoon and leaves the surface just as green. Attacking efflorescence with a strong acid can etch the paver and leave a dull patch that looks worse than the bloom ever did, and it is permanent.
Whatever you decide to use, test it first on a paver nobody looks at, under a pot or tight against a wall, and give it a day before you commit to the whole area.
| What you see | What it is | First step |
| Grey, dulled surface across the whole area | Ordinary grime and traffic dirt | Sweep, then warm water, mild detergent and a stiff brush |
| Green or black patches, worst in shade | Mould, algae or lichen | A dedicated outdoor mould treatment on a dry surface |
| White powdery bloom in patches | Efflorescence, salts from the concrete | Leave it to weather, then a dedicated treatment if it persists |
| Dark localised stain | Oil, rust or leaf tannin | Identify the source, then treat for that stain type |
The basic clean, in order
Sequence matters more than product, and most of a good result comes from doing the steps in the right order.
- Clear the furniture, pots and barbecue off the area so you can work across the whole surface.
- Sweep thoroughly, including the joints, the edges and anywhere leaf litter has packed down.
- Remove weeds and moss from the joints by hand or with a joint knife, before anything gets wet.
- Pre-wet the area with plain water so the detergent works on the surface rather than soaking straight in.
- Apply warm water with a mild detergent and work it in a section at a time with a stiff-bristled brush.
- Rinse from the high side, so the dirty water runs away rather than back across what you have cleaned.
- Top up the jointing sand once the surface is completely dry.
Weeds come out before the water goes down because wet growth tears off at the surface and leaves the root sitting in the joint, ready to come back. Dry joints give you the whole plant, which makes this the moment to do proper weeding across the area rather than a quick pull.
Jointing sand is the fine sand packed between pavers that locks them against each other and keeps the surface stable, so replacing what washes out during a clean is not optional.
One last thing: water down nearby garden beds before you start and again afterwards, keep runoff away from plants where you can, and follow the label on anything you use.
Mould, algae and lichen on shaded pavers
Green and black growth is a moisture and light problem, which is why it returns to the same corner every year no matter how well you scrub it.
Sydney gardens produce the conditions for it constantly. South-facing courtyards that never see direct sun, pavers sitting under a canopy, areas that stay damp because the fall is wrong or the drainage is not carrying water away, and coastal air that keeps surfaces humid for longer.
Treatment is straightforward enough: a dedicated outdoor mould or moss treatment, applied to a dry surface, left for the time the label states, then brushed off and rinsed thoroughly. Follow the label, do not mix products, and protect the plants around the edges.
The part that actually fixes it is structural. If the same patch greens up every spring, the answer is more light and better drainage, which usually means cutting back the growth above them to let sun and moving air reach the surface, and dealing with wherever the water is sitting. Cleaning alone just resets the clock.
Pressure washing: when it helps and when it damages
A pressure washer is a legitimate tool on sound concrete pavers, provided it runs at low pressure with a wide fan tip, kept moving and held well back from the surface.
Used that way it lifts embedded grime faster than a brush will. Used badly it does damage you cannot undo. Concentrated pressure blasts the jointing sand out of the joints, and once the joints are empty the pavers lose their interlock and begin to rock and spread. On concrete pavers it scours the cement paste off the face, leaving a rougher, more porous surface that holds dirt better than it did before, so the area looks worse sooner. Soft natural stone and older clay pavers can be pitted outright in a single pass.
Start at the lowest pressure that does anything useful, test it on a paver out of the way, keep the tip moving and never drive it straight into a joint. Re-sand the joints afterwards, every time.
Should you seal your pavers?
Sealing is optional rather than necessary, and it is worth doing only once the surface is clean, dry and structurally sound.
What a sealer does is slow absorption, which reduces staining, holds back the appearance of efflorescence at the surface, and in many cases enriches or slightly darkens the colour. What it does not do is repair a failing base, correct drainage or rescue a surface that is already damaged.
The conditions are strict. The pavers need to be clean, completely dry and free of efflorescence before anything goes on, because sealing a damp or dirty surface traps the problem underneath where you then have to strip the sealer to reach it. Sealers also need reapplying periodically rather than being a one-off job.
One point worth weighing before you choose a finish: a gloss sealer can make a wet surface noticeably more slippery, which matters a great deal around a pool, on steps or on a sloping path.
When cleaning will not fix it
Some of what looks like a dirty surface is a construction problem, and in those cases cleaning buys you a season at best.
The signs are easy enough to spot once you know them. Pavers that rock underfoot. A lip or step appearing between neighbouring pavers that used to sit flush. Water pooling in the middle of the area instead of draining away. Joints that will not hold sand no matter how often you top them up. Weeds coming through the whole surface rather than along the edges. A line of lifted pavers tracking a tree root.
Any of those mean the base beneath the pavers has moved, washed out or was never right. The surface can usually be lifted and relaid over a properly rebuilt base, and only sometimes does it need replacing outright, but either way no amount of detergent will hold it together in the meantime.
Frequently Asked Questions
What is the best thing to clean pavers with?
Warm water, a mild detergent and a stiff-bristled brush handle most ordinary grime. Green and black growth needs a dedicated outdoor mould treatment instead. Avoid strong acids and bleach on coloured concrete and natural stone, since both can etch or discolour the surface, and always test on a hidden paver first.
Can I use a pressure washer on pavers?
Yes, with care. Use low pressure and a wide fan tip, keep it moving, hold it well back, and re-sand the joints afterwards. High pressure strips jointing sand out of the joints and scours the surface off concrete pavers, and it can pit soft natural stone or older clay pavers in one pass.
How do I stop mould coming back on my pavers?
Recurring mould is a light and drainage issue rather than a cleaning one. Cut back overhanging growth so sun and moving air reach the surface, and fix wherever water is sitting after rain. Cleaning on its own treats the symptom, and the growth is usually back within a season.
What is the white powder on my pavers?
That is efflorescence: salts inside the concrete migrating to the surface with moisture and crystallising there. It is normal on new paved areas and usually fades as the pavers weather. Scrubbing does very little, and acid can etch the surface permanently, so patience or a dedicated treatment is the better option.
Do pavers need to be sealed?
Sealing is optional, not required. On a clean, dry surface it reduces staining and can enrich the colour, which is why many people like it. Bear in mind that sealers need reapplying over time, that gloss finishes can be slippery when wet, and that sealing will not fix a failing base.
The short version
Work out what you are looking at before you touch it, clean in order, keep the pressure low and the fan wide, and treat growth that keeps returning as a drainage and light problem rather than a cleaning one.
If your pavers are moving, sinking or losing their joints rather than simply looking dirty, the team at A1 Gardening & Landscaping Sydney has been building and rebuilding Sydney’s outdoor surfaces for more than 15 years and can tell you whether the surface can be relaid or needs replacing. Talk to us about what the area is doing, or get in touch to arrange a time to look at it. Call 0451 267 287, with the team available 24 hours.

