
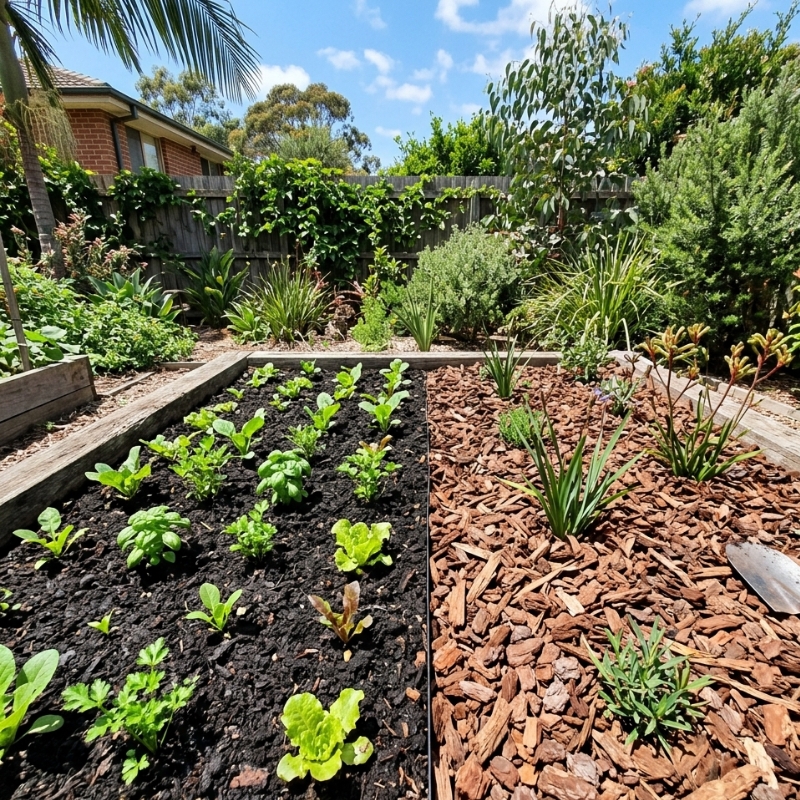
Sydney gardeners talk a lot about “building soil health”, yet many mix up mulch and compost, treating them as if they are interchangeable. The truth is, they solve different problems. Compost is soil food. Mulch is a protective blanket. If you are frustrated by weeds, dry beds, or plants that refuse to thrive, understanding the role of each layer is the first step. By the end of this guide, you will be able to diagnose what your garden beds are actually lacking, apply the right material at the right depth, and avoid the common traps that waste money and effort. If you decide the job is bigger than a DIY weekend, a professional mulching service can handle the heavy lifting when timing, volume, or access become tricky.
1. Mulch and Compost Defined: Why Purpose Matters More Than Product
Many products in the garden centre share the word “mulch” or “compost” on the bag, but the purpose decides how they should be used, not the label.
| Layer | Primary Purpose | What It Looks Like | Typical Materials | How It Works |
| Compost | Feeds soil life, adds nutrients | Fine, crumbly, earthy smell | Decomposed plant matter, food scraps, manure mixes | Mixed or raked lightly into topsoil to improve fertility |
| Mulch | Protects soil surface, suppresses weeds, moderates temperature | Coarser particles, visible pieces | Wood chips, bark, straw, leaf litter, gravel | Sits on top, shades soil, breaks down slowly |
Compost goes in the soil. Mulch stays on top of the soil. Mixing thick layers of mulch into beds can lock up nitrogen and starve plants, while spreading compost too thin as a surface cover will dry into a crust. Knowing this distinction prevents the most common “my tomato seedlings died” complaint heard through Sydney community garden groups.
2. How Sydney’s Weather Shapes Your Top-Layer Choice
Sydney delivers humid summers, sudden downpours, and drying southerlies. Each weather swing affects soil moisture, microbial life, and weed pressure.
Moisture loss in summer heat
Bare soil can lose up to 70 percent of its surface moisture on a 35 °C day. A 7 cm wood-chip mulch layer drops that evaporation rate dramatically, creating a cooler root zone that helps ornamentals and vegetables survive heat spikes.
Nutrient leaching after heavy rain
Conversely, Sydney’s east-coast lows can dump 100 mm overnight. Nutrients are flushed beyond root reach. Compost blended into beds improves the soil’s capacity to hold onto nitrogen and potassium, reducing post-storm yellowing.
Seasonal timing tip
• Late winter to early spring: Focus on compost to fuel new growth.
• Late spring to early summer: Apply or top up mulch before the heat arrives.
• Late autumn: Thin compost dressing replenishes beds after the growing season.
3. Quick Tests: Does Your Garden Need Food or Protection First?
Not sure which problem is showing up in your garden? Use the observations below before you reach for the shovel.
| Sign You Notice | Likely Problem | Best First Step |
| Soil is dusty and water runs off quickly | Low organic matter, poor structure | Fork in 2 cm compost, then water |
| Green weeds popping up everywhere | Light reaching seed bank | Apply 7–8 cm coarse mulch |
| Leaves pale or plants stunted despite watering | Nutrient shortage | Blend compost, then apply 3 cm fine mulch to lock it in |
| Seedlings damping off, mushrooms in beds | Thick moisture layer, poor airflow | Reduce mulch depth, add compost for microbial balance |
Spend ten minutes digging a small hole. If the top 10 cm crumble with little life or earthworm activity, compost is overdue. If the soil is rich but exposed and full of tiny weed seedlings, mulch will give quicker relief.
4. Matching Material to Plant Type: Native Beds vs Veggie Patches
Different plant communities prefer different surface conditions.
| Garden Type | Top-Layer Goal | Best Choice | Depth Guide |
| Native shrubs and grasses | Mimic leaf litter, avoid excess nutrients | Eucalyptus leaf mulch, chunky wood chips | 5–6 cm |
| Citrus and fruit trees | Steady moisture, moderate fertility | Compost circle near trunk, coarse mulch ring outside drip line | 2 cm compost, 8 cm mulch |
| Raised veggie beds | Fast nutrient turnover, weed suppression | Well-finished compost plus sugarcane or lucerne mulch | 3 cm compost, 5 cm fine mulch |
| Ornamental flower beds | Colour contrast, moisture retention | Dyed pine bark or decorative pebble mulch | 5 cm |
Common Mistakes Sydney Gardeners Make (and How to Avoid Them)
- Piling mulch against trunks and stems
Moist, warm mulch around bark encourages rot. Pull it back 5 cm from the stem.
- Adding uncomposted manure as “mulch”
Fresh manure heats and burns roots. Always finish composting before surface use.
- Ignoring mulch breakdown after storms
Heavy rain can splash soil onto foliage, spreading fungal spores. Rake the disturbed mulch smooth once the bed dries.
- Skipping compost because native beds “don’t need food”
Even natives appreciate a light sprinkle of compost every second year to maintain soil life.
- Over-mulching containers
Pots dry differently from ground beds. A thin 2 cm layer of fine mulch is enough for most tubs.
6. Deciding Factor Table: Five Questions to Pick the Right Top Layer Today
Introduce this practical checklist on your phone before the next Bunnings run.
| Question | Mostly “Yes”? | Action |
| Are my plants well fed but drying out quickly? | Mulch | |
| Do new leaves look small or pale? | Compost | |
| Are weeds outpacing growth each month? | Mulch | |
| Does water pool on the surface then drain fast? | Compost, then light mulch | |
| Have I added fertiliser in the last four weeks? | Mulch only to seal in nutrients |
Answer three or more in one column and you have your plan.
7. Layering Them Together: A Safe Sequence That Works
Sydney soils love a “compost first, mulch second” rhythm. Work 2 cm of mature compost into the top few centimetres. Water it in. Then add 5–7 cm of coarse mulch. This locks moisture in, shades microbes, and saves you from constantly topping up fertiliser.
According to the NSW DPI home-garden composting guide, incorporating small compost amounts regularly supports microbial diversity and reduces disease outbreaks, especially in humid coastal climates like Sydney’s.
8. Checking Thickness: When Less or More Changes Results
If mulch is too thin, weeds win. Too thick and new shoots struggle to push through.
Sydney studies show that 5–7 cm of chunky wood chips is the sweet spot for weed suppression without suffocating roots. For fine compost, 1–2 cm blended into the topsoil is usually enough. Once you have decided on mulch, review this dedicated guide on ideal mulch thickness for extra detail.
Re-measure every six months. Organic mulches can shrink by a third in a single wet summer, exposing soil just as the next heatwave arrives.
9. FAQs
1. Can I use compost as mulch if I am short on materials?
You can, but be aware it dries out and forms a crust unless covered with straw or fine wood chips. It is usually better to mix compost into soil and then add a protective mulch layer.
2. Does coloured bark mulch harm plants?
Reputable Australian suppliers use water-based, non-toxic dyes. Problems occur only when mulch is piled too deep or allowed to touch plant stems.
3. How often should I refresh mulch in Sydney?
Top up annually for chunky bark and every six to eight months for finer materials like sugarcane, especially after heavy summer rain.
4. Will compost attract pests?
Well-finished compost that no longer smells sweet or sour is unlikely to attract rodents or flies. Cover or bury fresh kitchen scraps during the composting stage to avoid problems.
5. Is gravel mulch a good option for low-water gardens?
Gravel moderates soil temperature and reduces evaporation but adds no organic matter. Pair it with occasional compost dressing to keep microbes active.
Final Thoughts
Choosing between mulch and compost starts with diagnosing whether your soil needs food or protection. Use the quick tests, watch local weather patterns, and match the material to plant type. Apply compost lightly into the root zone, add mulch on top at the right thickness, and pull it back from stems. These small steps prevent many of the watering, weeding, and nutrient headaches that plague Sydney gardens. If you prefer to skip the hauling and spreading, professional help is only a call away, but understanding the why behind each layer means you will recognise quality work when you see it.

